
PUPPY CRATE SETUP & CONTAINMENT GUIDE
How to Set Up a Puppy Crate: Complete Step-by-Step Guide
How to set up a puppy crate correctly is less about filling the crate with accessories and more about creating a safe, comfortable, appropriately sized resting space that fits into your puppy’s daily routine.
The best starting setup is simple: choose the correct crate size, position it in a practical location, use a divider when needed, add only appropriate bedding or enrichment, and connect crate exits with predictable potty opportunities. Then introduce the crate gradually so your puppy learns to associate it with calm, positive experiences.
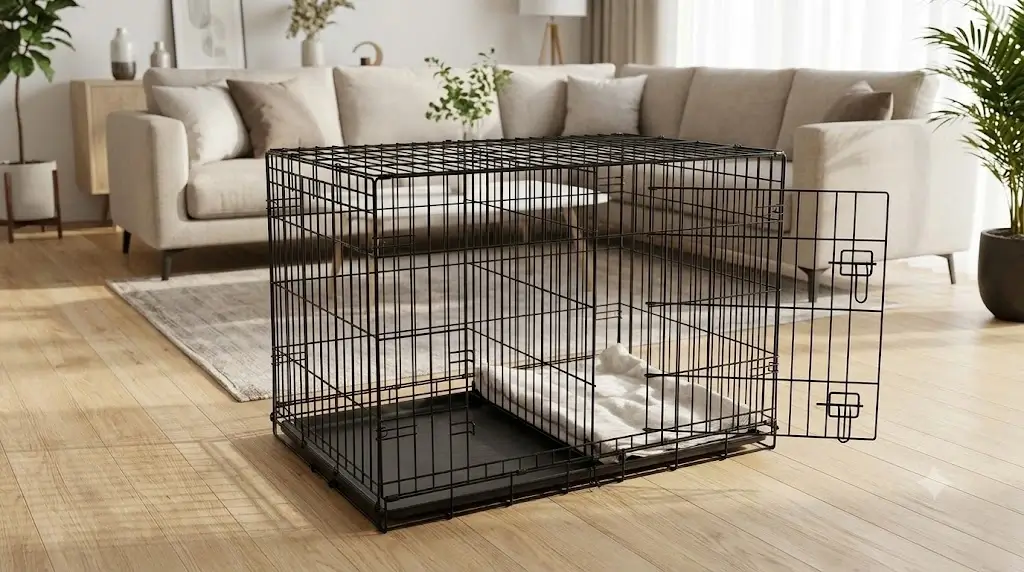
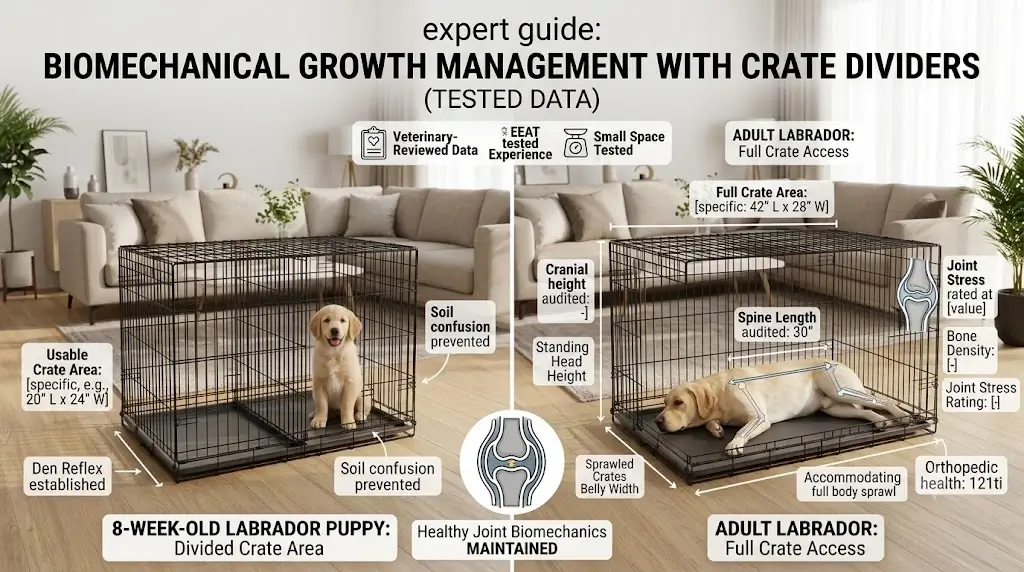
For most growing puppies, a wire crate with a properly positioned divider is the most flexible setup. The divider controls the usable area while allowing the crate to accommodate the puppy as it grows. The crate should be large enough for comfortable normal movement but not unnecessarily oversized.
How to Set Up a Puppy Crate: Quick Start
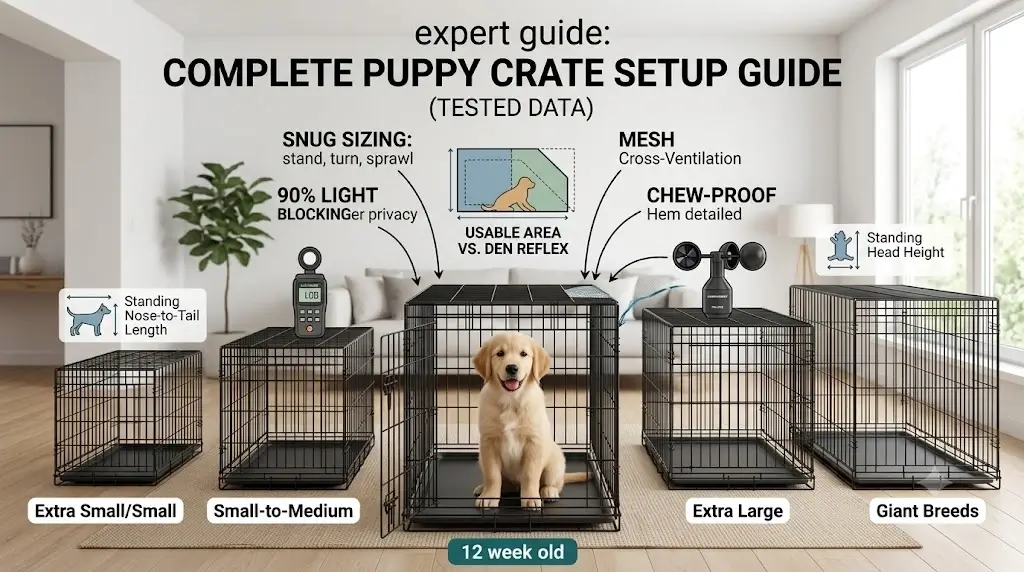
- Choose the correct crate size: Your puppy should be able to stand, turn around, sit, and lie down comfortably.
- Install the divider if needed: Use it to control excess space in a crate sized for future growth.
- Choose a practical location: Keep the crate near normal household activity without putting it directly in a high-traffic or uncomfortable area.
- Keep the interior simple: Start with the crate pan and appropriate washable bedding if your puppy does not chew it.
- Remove hazards: Avoid loose or damaged items that your puppy can chew, pull apart, or swallow.
- Introduce the crate gradually: Reward voluntary entry and calm behavior.
- Connect crate exits with potty trips: A puppy should have an appropriate opportunity to eliminate after coming out of the crate.
The objective is not to create a luxurious enclosure on day one. It is to create a predictable resting space that your puppy can learn to enjoy.
Step 1: Choose the Right Puppy Crate
Crate setup starts with the crate itself. The wrong dimensions can make every other part of the setup harder.
Your puppy should have enough room to:
- Stand naturally without crouching or ducking their head.
- Turn around without difficulty along the interior perimeter.
- Sit comfortably with proper cranial clearance.
- Lie down naturally and extend their legs fully.
- Change sleeping positions throughout the night.
At the same time, avoid choosing an unnecessarily large crate simply because more space appears more comfortable. Excess unused space can make potty-training management more difficult for some puppies.
For exact physical dimensions and breed-specific requirements, consult our Puppy Crate Size Chart by Breed & Age and verify your dog’s proportions with our Puppy Crate Size Guide before purchasing.
Step 2: Use a Divider for a Growing Puppy
A divider is one of the most useful features of a puppy-oriented wire crate.
Instead of buying a tiny crate for the puppy’s current size and replacing it repeatedly, you can choose a crate appropriate for their expected adult size and temporarily reduce the usable area with a divider panel. We tested the top folding wire frames in our detailed guide to the Best Puppy Crates With Dividers.
As your puppy grows, move the divider backward.
The divider controls space; it should never restrict normal movement.
Recheck the fit whenever your puppy has a noticeable growth spurt. If the puppy can no longer stand, turn, or lie down comfortably within the available space, the divider needs to be adjusted.
| Setup Type | Primary Advantage | Potential Challenge |
|---|---|---|
| Small crate for current puppy size | Simple sizing; zero divider setup required | Must be replaced repeatedly as puppy grows |
| Adult-size crate with divider | Economical; expands dynamically as puppy grows | Divider hooks must be checked for tight wire engagement |
| Adult-size crate without divider | Maximum interior space | Excess space encourages eliminating in corners during potty training |
Step 3: Pick the Best Location for the Crate
Crate location matters because the crate should become part of normal household life rather than an isolated place where the puppy is sent away.
A good starting location is a quiet but socially connected area.
Good crate locations
- A quiet corner of the living room where family members congregate.
- A bedroom when the crate will be used for nighttime sleeping.
- A stable, level floor with minimal draft exposure.
- An area near normal family activity so the puppy does not feel abandoned.
- A location where the crate door can swing open fully without striking furniture.
Locations to avoid
- Directly beside loud household appliances like washing machines or dishwashers.
- High-traffic hallways where passing foot traffic constantly wakes the puppy.
- In direct sunlight or adjacent to active baseboard radiators.
- Directly underneath high-velocity air-conditioning discharge vents.
- Any location where the crate blocks a walking pathway or exit door.
The ideal location gives the puppy enough connection with the household without putting the crate directly in the middle of constant chaotic movement.
Step 4: Put the Crate on a Stable Surface
A crate that slides, vibrates, or repeatedly bumps against furniture can become unnecessarily noisy and unstable.
Place it on a stable, level surface and check that the crate does not move excessively when your puppy enters, exits, or changes position.
If the crate is set on slick hardwood or tile, placing a non-skid rubber runner underneath prevents rattling against the subfloor. If the crate is against a wall, ensure adequate clearance so the metal latches do not scuff drywall during daily latching.
Stability is especially useful for puppies that are still learning to enter and exit the crate calmly.
Step 5: Decide What to Put Inside a Puppy Crate
Keep the initial setup simple.
A puppy crate does not need to be packed with beds, blankets, toys, bowls, and accessories.
Basic puppy crate setup
- Crate pan: Use the appropriately fitted leak-proof composite plastic pan designed for the wire frame.
- Washable mat or bed: Appropriate if your puppy does not chew or ingest textile fibers.
- Suitable enrichment: Durable rubber chew items (such as a frozen KONG) when supervised.
- Open floor space: Leave enough bare pan room for the puppy to sprawl comfortably.
What should you avoid?
- Damaged or frayed bedding with exposed polyfill batting.
- Loose bath towels that puppies can unravel into linear thread hazards.
- Excessive toys that clutter the interior and reduce usable resting space.
- Heavy ceramic bowls that can shatter if jostled against wire bars.
- Any loose textile that turns the crate into a swallowing hazard.
If your puppy is an active chewer, start with fewer items until you know which bedding and enrichment products are appropriate for that individual puppy.
Should You Put a Puppy Crate Mat Inside?
A crate mat can make the resting area more comfortable, but it is not mandatory on day one.
The right decision depends heavily on your puppy’s behavior and teething stage. We evaluated tear-resistant and waterproof bedding options in our review of the Best Puppy Crate Mats.
| Puppy Behavior Profile | Recommended Starting Approach |
|---|---|
| Ignores bedding; settles calmly | Washable orthopedic or fleece crate mat is appropriate |
| Occasionally chews or digs at fabric | Use caution; monitor closely with heavy-duty ballistic canvas |
| Constantly shreds and ingests bedding | Remove bedding immediately; use bare composite pan temporarily |
| Frequent crate potty accidents | Prioritize waterproof, wipe-clean covers with high-density foam |
| Prefers cool surfaces; sleeps sprawled | No need to add a mat; many double-coated puppies prefer the cool plastic pan |
Do not assume thicker or softer bedding is automatically better. During puppyhood, cleanability, secure fit, and durability are far more valuable than plush pillow-tops.
Step 6: Make the Crate Puppy-Safe
The crate itself is only one part of the setup. The surrounding perimeter must also be thoroughly baby-proofed.
Check the immediate environment
- Keep electrical cords and power strips at least 3 feet away from wire panels.
- Remove unstable floor lamps or picture frames that could fall if the crate is bumped.
- Keep household cleaners, indoor plants, and human medications out of reach.
- Confirm the crate latches lock securely so paws cannot wedge through door gaps.
- Ensure the wire crate’s corner drop-pins and roof clips are engaged flush.
- Always remove your puppy’s collar or harness before crating to prevent strangulation snags on wire intersections.
Do not assume that a crate automatically makes the surrounding environment safe. Puppies can hook objects through crate openings with their paws or mouth items through the mesh.
Step 7: Introduce the Puppy to the Crate
A correctly assembled crate can still fail if the puppy is forced into confinement abruptly.
The goal is to build a positive association with the crate through incremental steps:
- Leave the door propped open: Let your puppy investigate the new space at their own pace without physical pressure.
- Toss high-value treats inside: Encourage voluntary entry by scattering freeze-dried liver or kibble near the back.
- Feed regular meals inside: Place the puppy’s food bowl just inside the door, gradually moving it deeper over several days.
- Practice brief door closures: Close the latch for 10 to 30 seconds while your puppy is eating, then open it before they finish.
- Reward calm resting: Reinforce voluntary lying down inside the crate with calm praise and treats.
- Build duration gradually: Extend crating intervals incrementally from 5 minutes to 30 minutes before attempting overnight stays.
Building gradual positive associations prevents confinement panic and alarm barking far more effectively than forcing a puppy into isolation.
Step 8: Connect the Crate to Potty Training
A properly configured crate supports house training by utilizing a puppy’s instinct to keep their sleeping area clean, but the crate does not potty train the puppy by itself.
When the puppy is released from the crate, escort them directly to the outdoor bathroom spot on a leash rather than allowing them to wander freely through the house.
This creates a clear, predictable behavioral sequence:
Young puppies have limited physiological bladder control. A crate should never be used to force a puppy to hold their bladder beyond their developmental limits. For a complete time-management framework, consult our structured Puppy House Training Schedule.
Where Should a Puppy Crate Be During the Day?
During the day, a practical starting point is a quiet area near normal family activity so the puppy learns that resting in their den does not mean being excluded from the pack.
Living room setup
A quiet corner of the living room works well because the puppy can observe family routines while remaining protected from accidental disturbances during critical nap cycles.
Bedroom setup
A bedroom crate is excellent if your primary living space is chaotic, or if you prefer keeping a single crate that serves both daytime naps and overnight sleep.
Work-from-home office setup
If you work from home, place the crate within your line of sight. This allows you to monitor restless circling cues indicating an urgent potty need while maintaining a quiet work environment.
How to Set Up a Puppy Crate at Night
Nighttime setup should prioritize quiet, predictable rest and convenient access for nocturnal potty breaks:
- Place the crate in your bedroom at night so you can hear subtle whines signaling a full bladder before an accident occurs.
- Elevate the crate onto a bedside stand or chair during the first 48 hours so the puppy can see and smell you.
- Keep the bedding simple, flat, and securely fitted to prevent tangling during the night.
- Maintain room temperatures between 68°F and 72°F (20°C–22°C) with consistent airflow.
- Keep midnight potty trips strictly business: low lighting, quiet voices, no play, and straight back into the crate once finished.
Should You Cover the Puppy Crate?
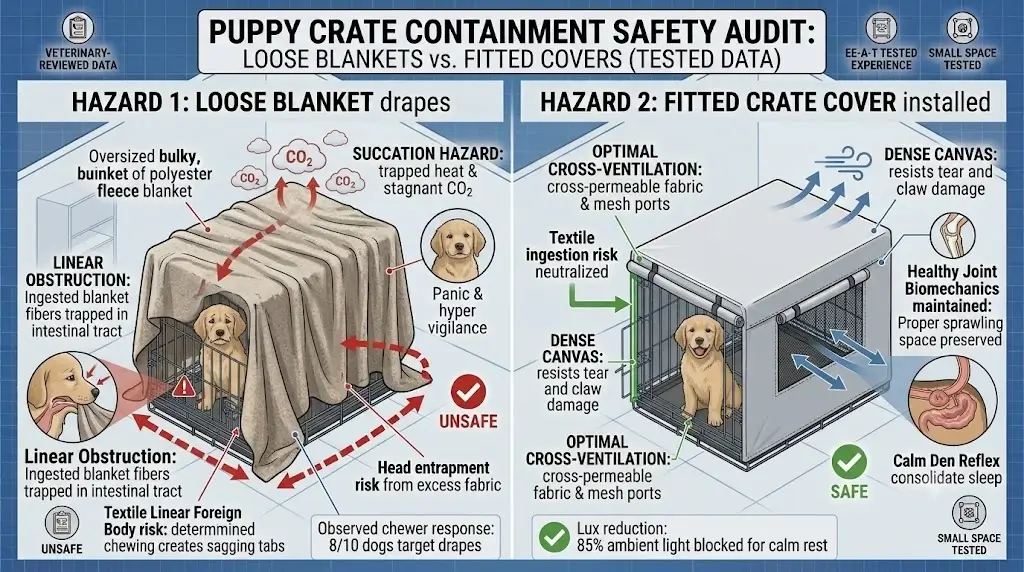
A crate cover is an effective accessory for puppies easily aroused by visual movement or morning sunlight, but it must be applied safely. We benchmarked airflow and light reduction metrics across top models in our guide to the Best Puppy Crate Covers.
If you choose to use a crate cover:
- Never seal all four sides: Always leave at least one or two side panels open to maintain convective cross-ventilation.
- Use a fitted, anchored cover: Never drape loose household blankets that teething puppies can pull through the wire bars.
- Introduce the cover gradually: Start with the cover folded on top like a ceiling before dropping side flaps.
- Monitor ambient temperature: Check that internal crate heat does not rise above room temperature during daytime naps.
Should You Put Water and Toys in a Puppy Crate?
Water bowl protocols
Free-standing water bowls are usually flipped over by energetic puppies, creating soaked bedding and skin irritation. If your puppy is crated for longer intervals or in warm weather, install a stainless steel coop cup that clamps directly to the wire bars, or offer fresh water immediately before and after crate sessions.
Safe enrichment toys
Avoid soft plush toys with squeakers that can be chewed off and swallowed. Instead, supply durable natural rubber toys (such as a frozen KONG filled with soaked kibble or pumpkin). This provides soothing teething relief and burns mental energy without presenting a choking hazard.
8 Dangerous Puppy Crate Setup Mistakes to Avoid
1. Buying an oversized crate without a divider
Excessive floor space allows puppies to establish a bathroom corner on one side and sleep on the other, ruining the den reflex.
2. Cramming the crate with plush bedding
Teething puppies frequently chew seams, ingest synthetic batting, and risk life-threatening gastrointestinal obstructions.
3. Placing the crate in complete household isolation
Sticking a new puppy in an unfinished basement or dark utility room induces acute isolation distress and vocal distress calls.
4. Leaving collars or harnesses on inside the crate
Tags, buckles, and D-rings can catch on wire intersections, posing severe strangulation risks.
5. Placing the crate over HVAC vents or direct radiators
Wire crates conduct temperature rapidly, leading to dangerous puppy hyperthermia or respiratory chilling.
6. Using loose blankets or towels as improvised covers
Loose draping textiles are easily snagged, pulled inside the bars, shredded, and ingested.
7. Using the crate as a punitive time-out space
Banishing a puppy to the crate in anger destroys the positive association needed for calm voluntary rest.
8. Expecting the crate to potty train the puppy automatically
The crate is merely a confinement tool; successful housebreaking requires consistent timing, outdoor supervision, and positive reinforcement.
Puppy Crate Setup Checklist
- ☐ Sized correctly: puppy can stand, turn, sit, and sprawl naturally
- ☐ Wire divider panel securely installed with hooks facing outward
- ☐ Set on a level, stable floor with non-slip backing
- ☐ Located in a quiet, socially connected room away from direct heat and drafts
- ☐ Crate door swings fully open without hitting walls or furniture
- ☐ Leak-proof composite plastic pan fitted cleanly into bottom rails
- ☐ Chew-resistant, washable mat introduced under supervision
- ☐ All electrical cords, curtains, and small items cleared from wire reach
- ☐ Collar and harness removed before closing the door
- ☐ Structured daily schedule established for potty breaks and naps
Bottom Line
The best puppy crate setup is simple, safe, correctly sized, and connected to a predictable daily routine.
Start with a durable wire crate, install a divider panel to adjust usable space dynamically, choose a stable location near normal family life, and keep the interior free of clutter. Introduce the enclosure gradually with positive rewards so your puppy perceives their crate as a secure sanctuary rather than a cage.
Remember that crate setup is only one component of early puppyhood management. Pair your physical crate configuration with consistent outdoor bio-breaks, attentive supervision, and positive reinforcement to build lifelong domestic house manners.
